|
| ||
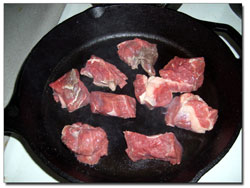
| Shades of brown The Maillard reaction is what happens when you brown meat. This chemical combination of amino acids and sugars at high temperatures produces hundreds of aromatic compounds, a bouquet of flavors and smells that deserves much of the credit for making meat taste good. You don’t need to be a chemist to properly create the Maillard reaction, but if you want to be a cook you have to master it. Once I was watching my friend cook dinner. He had some burger meat he wanted to stir-fry with veggies, and I suggested he first brown the meat. “Good idea,” he said, reaching for an onion. “What’s up with the onion?” I asked as he began chopping. “I like to brown meat with onion,” he said. I winced, because you can’t brown meat with onion – you’ll end up with either gray meat or burnt onions, because browning meat correctly takes more heat than onions can handle. “Gimme that meat,” I said. “And that pan.” It’s scary how few people know how to brown meat, especially when you consider how many recipes call for it. There are many reasons to do it, including improved flavor, texture and appearance, and in some cases to seal in moisture. The nature of the dish you’re cooking, and the kind of meat you’re using, will determine which method you use. The broiler and the pan are the most common tools for browning meat. In most cases, I prefer the broiler, where the Maillard reaction is elegantly simplified to its bare bones: heat and meat. As far as I’m concerned, the only reason to use a pan is if you’re browning smallish pieces that are part of a dish that will be further cooked in the same pan. Such was the case with my clueless friend, who wanted to stir-fry his burger meat with some vegetables. While the browning of large cuts of meat seals in the juices, with burger you want the opposite – to get rid of the moisture in order for the meat to brown. Start by preheating the pan. If the meat is fatty enough, no oil is required; otherwise, put some heat-tolerant oil, like safflower or grape seed, in the pan.
First the meat turns gray as water weeps out and steams it, but soon the water evaporates and the Malliard reaction kicks in. Keep stirring lest the meat stick to the pan and burn. If it does stick, take a few steps backward by adding liquid to the pan. Try sherry, wine, stock or even water. This process, called deglazing, can add flavor to your dish by incorporating the browned and caramelized materials – what the French call fond – that are stuck to the bottom of the pan. If you think it was lack of oil that caused the sticking, add a little more oil when you deglaze. As the moisture hits the pan and starts sizzling, gently scrape the fond from the bottom. Of course, if you do fully burn the meat to the pan, you have to acknowledge your mistake and not pretend it didn’t happen by stubbornly scraping the blackened bits of carbonized carcinogenic bitterness into your food. Better to transfer Once you’ve pan-browned your meat to perfection, you can now add those chopped onions. When you do, you will be rewarded with one of life’s finer smells, the interaction of browned meat and raw onion on a hot pan. This is part of the magic behind a good burger or Philly-steak sub, and wouldn’t be a bad place to stop cooking and start eating if you’re so inclined. Otherwise, proceed with your stir-fry or wherever your final culinary destination may be. The reason I usually prefer to brown under the broiler is that the broiler produces picture-perfect browning with less mess, and it’s easier. Whether I’m cooking a tough piece of meat long and slow – either by braising, stewing, or in a crock pot – or cooking a rare steak or roast, the process begins in the broiler. Steaks and roasts should be browned whole. If making stew or some other kind of chunky dish, it’s best to cut the meat into its final size to increase the surface area on which the Maillard reaction can take place. (It only happens on the surface because water inhibits the reaction). Place the meat on a pan or broiler rack about 4 inches beneath a preheated broiler, and watch it carefully, turning as it starts to gain color, until it’s nicely browned, but not black. And that’s it – a single sentence to perfectly browned meat. Be warned that the product of this most basic of cooking processes is so delicious that you might want to start with more meat than you need for the final product, since you can expect to lose some to snacking. As a safeguard, you might want to hide the red wine, too. Especially if I’m around – there’s no end to the amount of meat I can put away if the wine is flowing. Indeed, while browning is a crucial step toward many a good dish, a browned piece of meat can also be the end point of the cooking process. If so, you’ll want to use a tender cut of meat, and season it with salt and pepper before broiling it. Uncork that wine, and when the oven opens, it’s business time. Brown on the outside, red on the inside, and you’re golden in more ways than one. •
|
In this week's issue...
- December 18, 2025
- Let it snow
Although ski areas across the West have taken a hit, there’s still hope
- December 18, 2025
- Look, but don't take
Lessons in pottery theft – and remorse – from SW Colorado
- December 11, 2025
- Big plans
Whole Foods, 270 apartments could be coming to Durango Mall parcel


